Xamarin Studio 5.0 was released last week as part of the Xamarin 3.0 release and it now has built-in support for NuGet. There is no need to install the NuGet addin separately into Xamarin Studio 5.0 or MonoDevelop 5.0 since it is now “in the box”.
New Features
- Re-designed user interface.
- More integrated with the Solution window.
- Supports NuGet’s search syntax.
- Background package installation.
- Integrates with Xamarin Studio’s unified search.
- Support for NuGet packages in project templates.
- Package restore on opening a solution.
- Integrates with Xamarin Studio’s credential provider to provide proxy and package source authentication.
So let us a look at these features in more detail by looking at how to use the NuGet addin in Xamarin Studio 5.0.
Adding NuGet Packages
To add a NuGet package we need to open the Add Packages dialog. This can be done in the following ways:
- From the Project menu select Add Packages. The project will need to be selected in the Solution window.
- From the Solution window, right click the project and select Add – Add Packages.
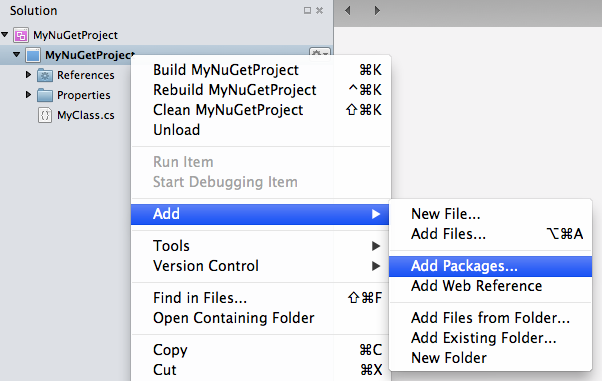
- From Xamarin Studio’s unified search, available in the top right of the main window, enter the name of the package you would like to search for, then select Search Packages.

- Double clicking the Packages folder in the Solution window will also open the Add Packages dialog (note the Packages folder is only displayed if you have a NuGet package installed in your project).
On opening the Add Packages dialog you will see a re-designed user interface.
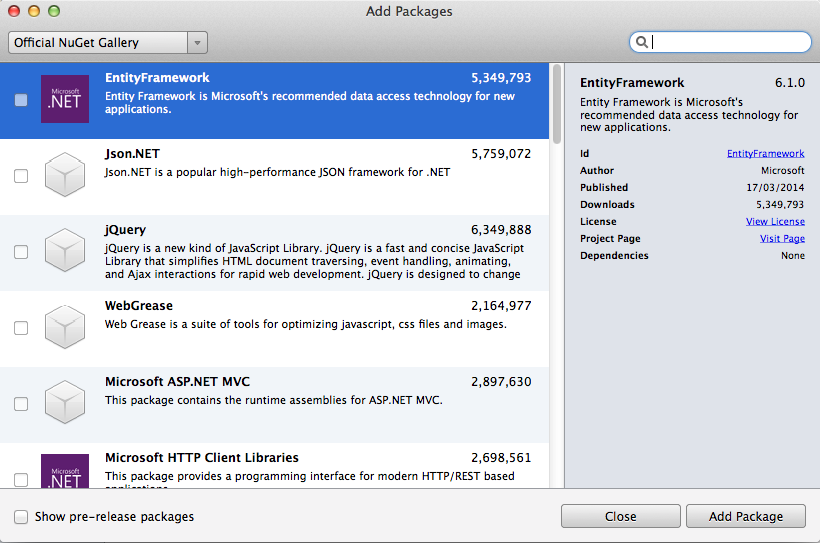
If a NuGet package has an associated image then it will now be displayed in the list of packages.
The search text box at the top right of the dialog will now search for packages as you type.
The package source combo box at the top left of the dialog now includes a new Configure Sources item which allows you to quickly switch to the configured package sources in preferences and back again to the Add Packages dialog.

The list of packages now has infinite scroll support. As you scroll down the list new packages will be retrieved from the package source and displayed. Previously you had to click a button to move to the next page.
To install a NuGet package in the Add Packages dialog you can do one of the following:
- Select a package and double click it.
- Select a package and press the enter key.
- Select a package and press the Add Package button.
To install two or more NuGet packages you can click the check box next to the package and then select the Add Packages button.
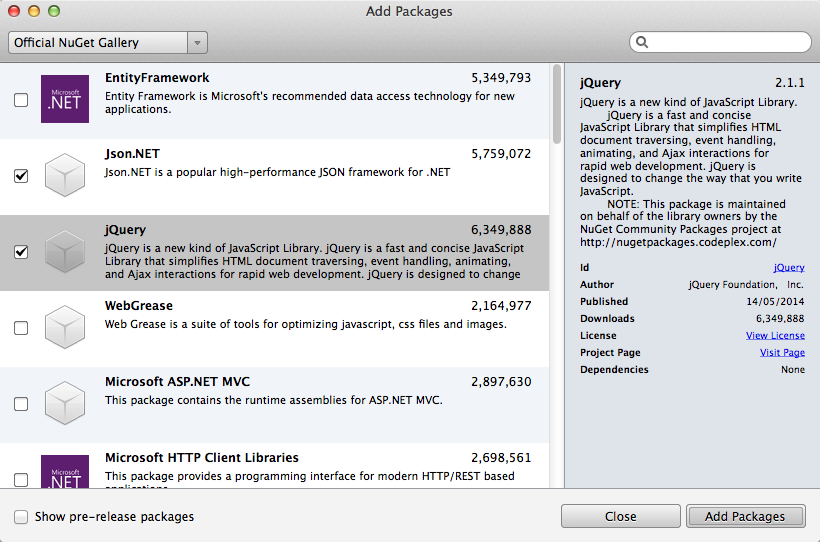
On adding the NuGet package the Add Packages dialog will close and the package installation will complete in the background. You will see status messages appear in the status bar at top of the main window as the installation progresses. The screenshots below show the status messages that are displayed when the NUnit NuGet package is installed.


More detailed information about the installation can be seen in the Package Console window.
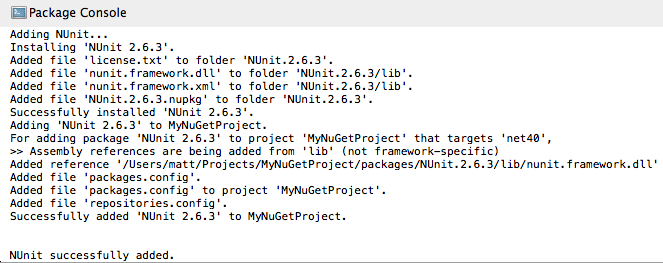
The Package Console can be opened by clicking on a package status message in the status bar or from the View menu by selecting Pads – Package Console. If there is an error when installing a NuGet package then the Package Console will automatically open to show more information about the error.
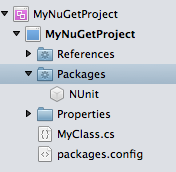
On adding the first NuGet package to a project a Packages folder will be displayed in the Solution window.
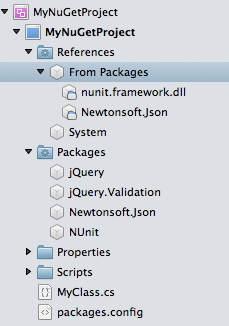
Any assembly references that a NuGet package adds to your project will be displayed in the From Packages folder inside References.
Whilst the NuGet package is being installed the package id text will be highlighted.
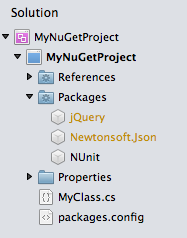
After the NuGet package is installed the text will be changed to black and a status message will be shown in the status bar.
Searching for Packages
The Add Packages dialog now supports the extended NuGet search syntax. Note that the NuGet package source will need to support this syntax. The main NuGet.org package source supports this search syntax.
So you can now make your search more specific by using one of the special tags, such as id, packageid, tags, author or owner. Some example searches are shown below:
id:NUnit
packageid:Xamarin.Forms
tags:typescript
owner:xamarin
author:xamarin
Removing NuGet Packages
You can remove a NuGet package from the Solution window. Expand the Packages folder for your project, select the package, right click and select Remove, or press the delete key.
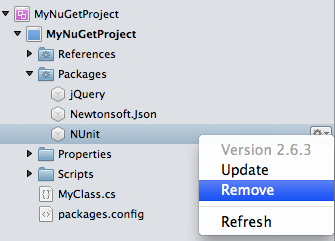
The package will then be uninstalled in the background. Status information will appear in the status bar and more detailed information will be shown in the Package Console window.


Updating NuGet Packages
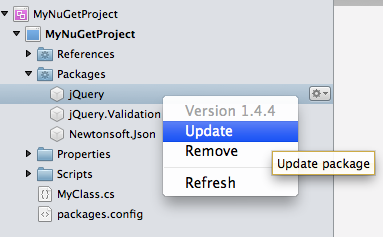
You can update an individual NuGet package by selecting it in the Solution window, right clicking and selecting Update.
You can update all the packages in a project by right clicking the Packages folder and selecting Update.
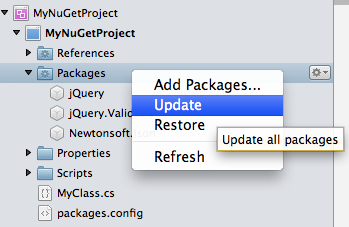
To update all the packages in the solution, either right click the solution in the Solution window and select Update Packages, or from the Project menu select Update Packages.
As with adding and removing a NuGet package you will see status bar messages as the update progresses and detailed information in the Package Console window.
Restoring NuGet Packages
By default NuGet packages will be automatically restored when a solution is opened.


You can disable this by going into preferences and unchecking Automatically restore packages when opening a solution.
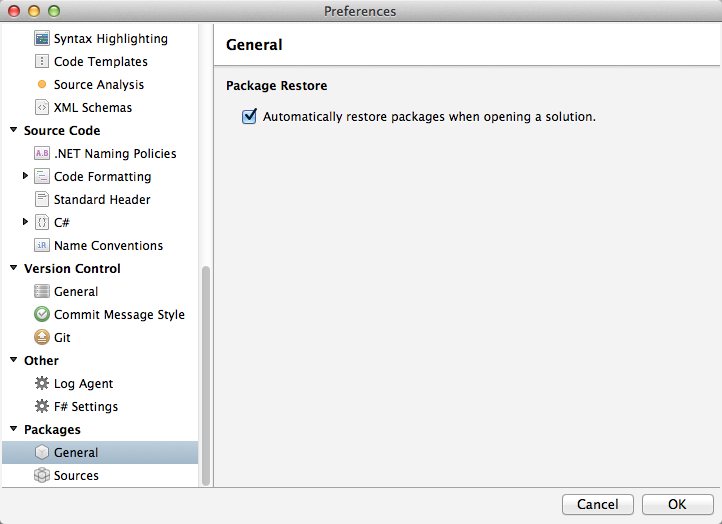
With automatic package restore disabled you can manually restore NuGet packages in the following ways:
- Right click the Packages folder in the Solution window and select Restore.
- Right click the solution and select Restore Packages.
- From the Project menu select Restore Packages.
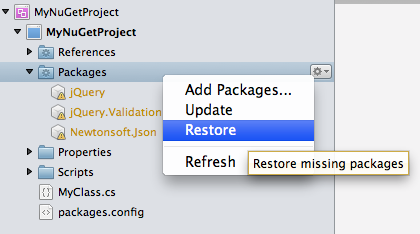
The status bar will be updated with information on the progress of the restore. More detailed information can be seen in the Package Console window.
NuGet Packages in Project Templates
You can now have a project template that will install NuGet packages. To do this you add a Packages element inside the Project element of the project template.
<Packages>
    <Package id="NUnit" />
    <Package id="jQuery" version="1.7.1" />
</Packages>
You can specify an exact version for the NuGet package. If the version is not specified then the latest version of the NuGet package will be installed.
By default Xamarin Studio will look for the NuGet packages from the main NuGet.org package source. To use your own package source instead you can create an addin and define the package source in its .addin.xml file. Inside your .addin.xml file you can add an Extension element which supports both online NuGet package sources and local directory package sources.
To define an online NuGet package source you can use the url attribute in your .addin.xml file:
<Extension path = "/MonoDevelop/Ide/ProjectTemplatePackageRepositories">
    <PackageRepository url="https://mynugetfeed.nget/packages" />
</Extension>
If you want your addin to work offline then you can include the NuGet packages with your addin in a subdirectory and use the following extension in your .addin.xml:
<Extension path = "/MonoDevelop/Ide/ProjectTemplatePackageRepositories">
    <PackageRepository path="packages" />
</Extension>
The path attribute here should contain the directory relative to where the addin is installed.
Package Source and Proxy Authentication
If a NuGet package source or a proxy needs authentication then Xamarin Studio will prompt for credentials.
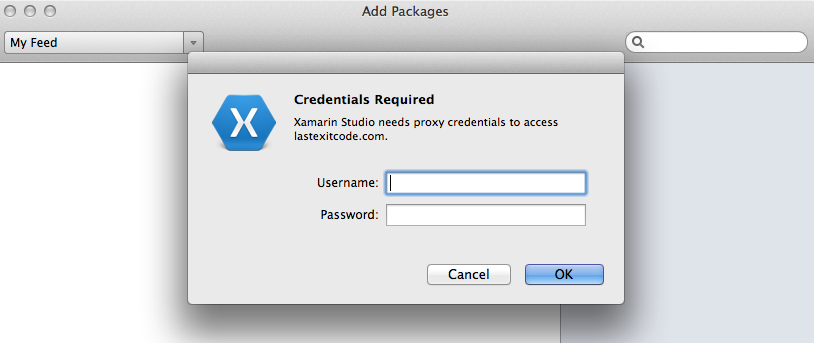
Please note that there is a bug that currently prevents proxy authentication with package sources that use https which will be fixed in the next release of Xamarin Studio.
Configuring NuGet Package Sources
NuGet package sources can be configured in preferences.
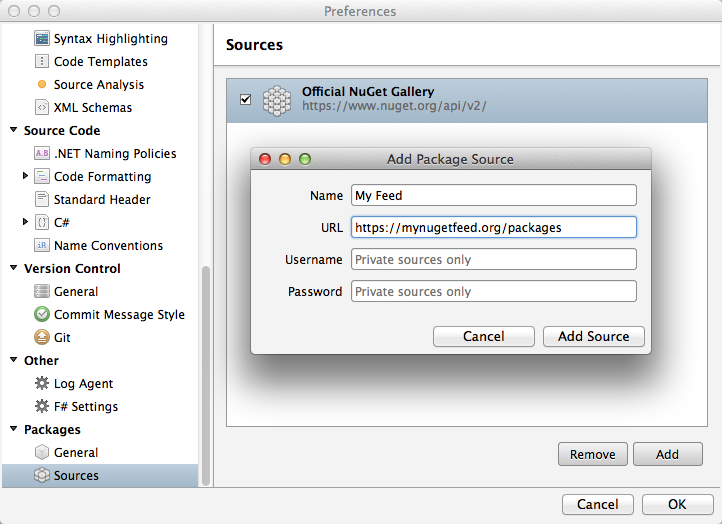
A new feature here is the ability to specify a username and password for a package source that requires authentication. The username and passwords are encrypted and stored in the NuGet.config file in the same way that NuGet.exe will if you use it on the command line.
That concludes our look at the new NuGet features in Xamarin Studio and MonoDevelop 5.0